
How to Make a Ribbon Belt With Horse Show Ribbons
The ribbon idea post hasn’t been sitting here in vain. After I out most of my ribbons in the jars, I wanted to get creative with some leftovers.
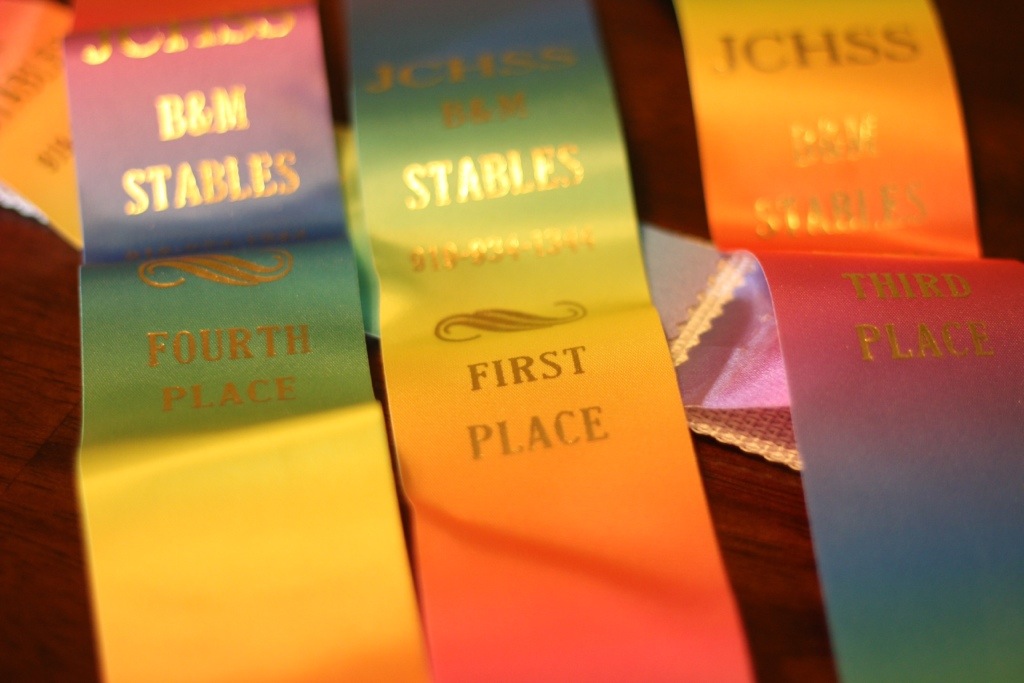
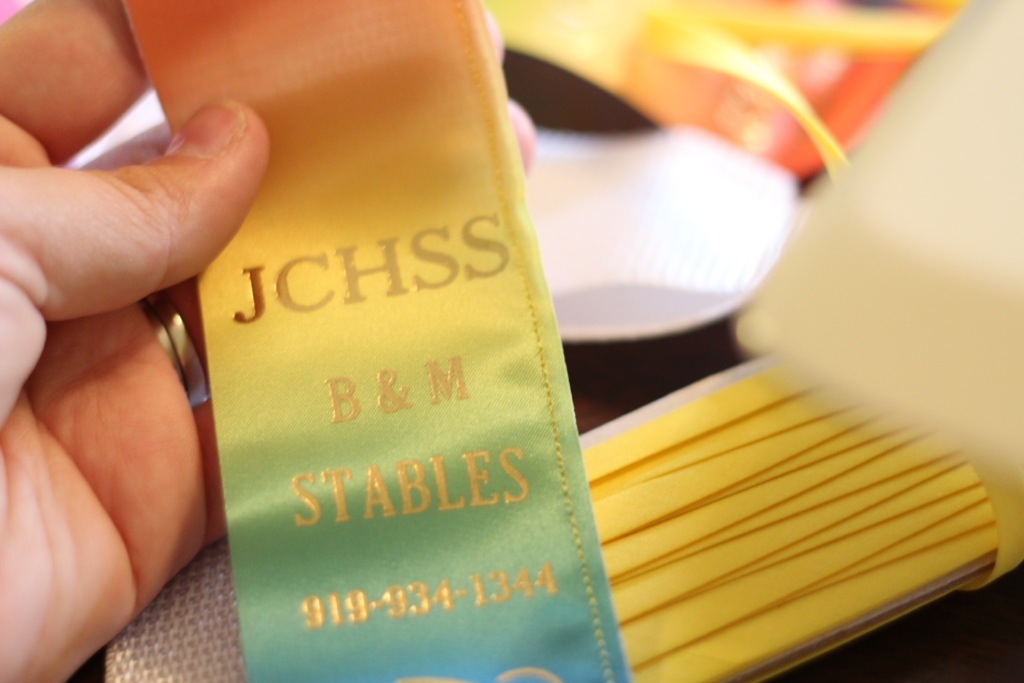
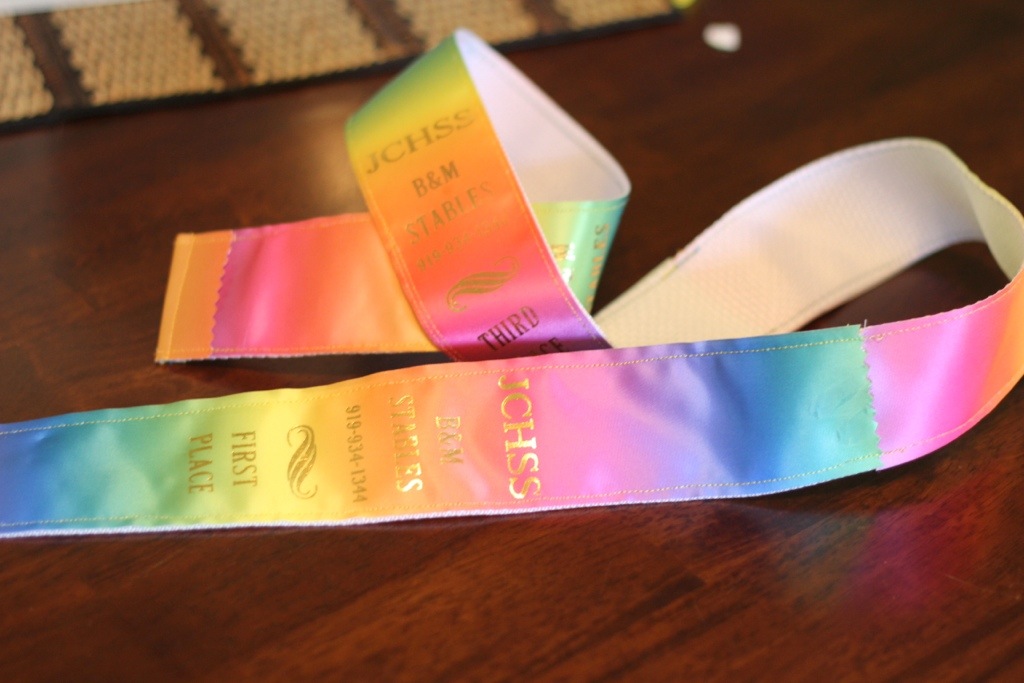
I have a ton of ribbons from a popular show series in NC that thought traditional ribbon colors were boring, therefore a ton of my ribbons have a very un-boring rainbow streamer. I didn’t want to include these rainbow streamers in my traditional colored pillow, but it’s the part of the ribbon with the show name and placing on it, so I didn’t want to throw it away entirely. This begins our ribbon belt project!
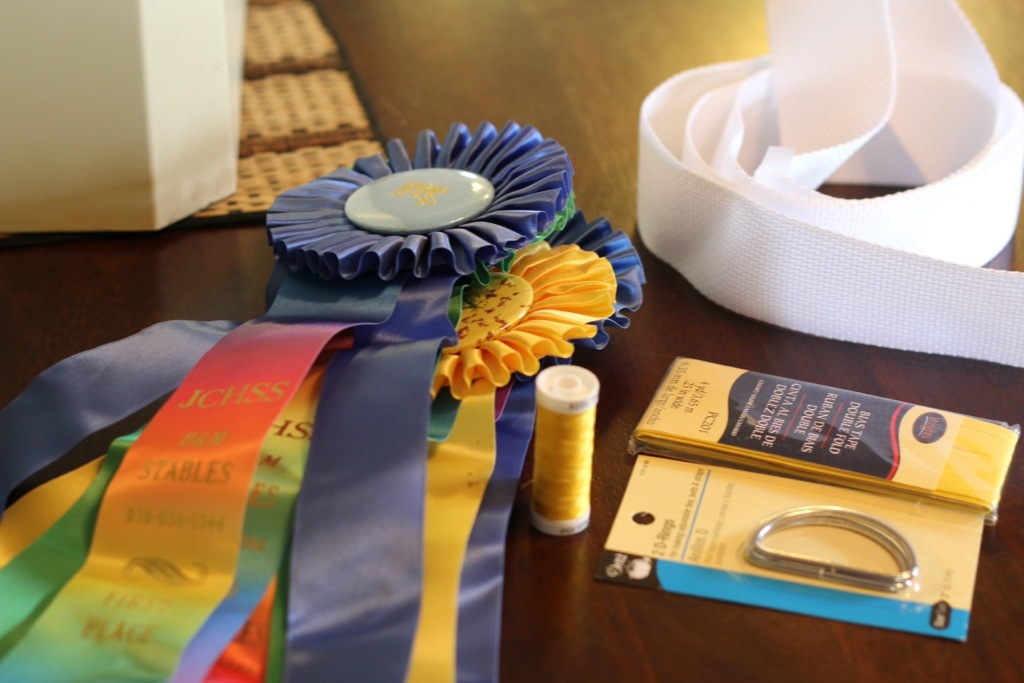
My materials were 2″ white nylon webbing, 2″ D rings, blanket binding and thread to match my binding. I also ended up using the middle streamer of 5 ribbons. You will need a sewing machine for this project – the nylon is too thick to see by hand.
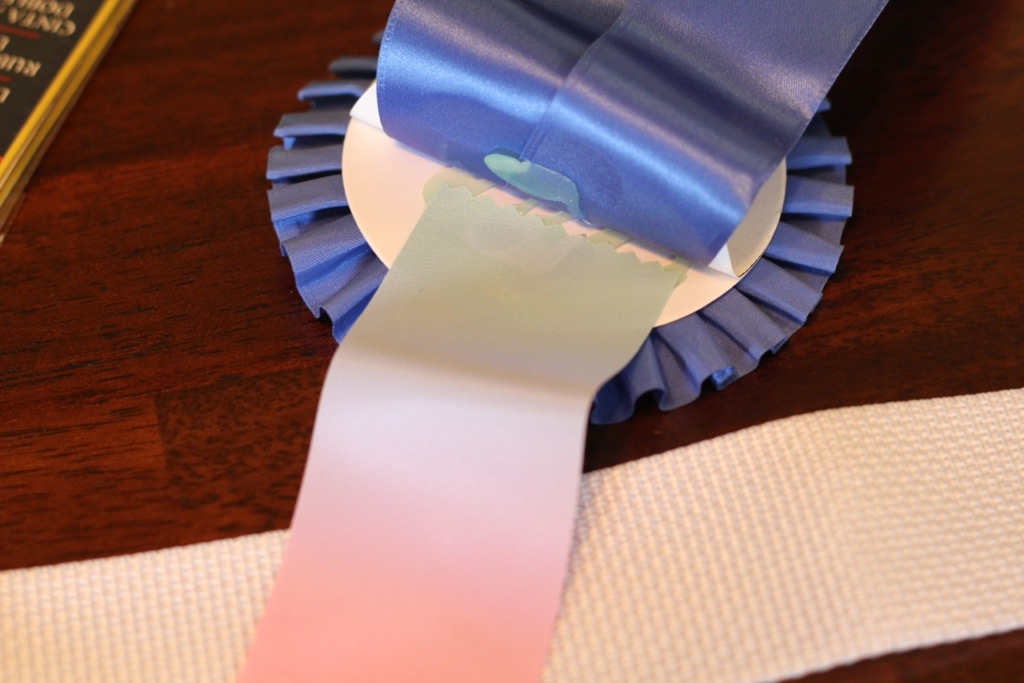
First I popped the streamer off my ribbons. Peel the back two streamers almost off and the you can get the middle streamer with little to no damage.
I then wrapped the nylon webbing around my waist where my breeches would sit. I marked how long the belt needed to be to to fit my waist and then added about 6″ extra.
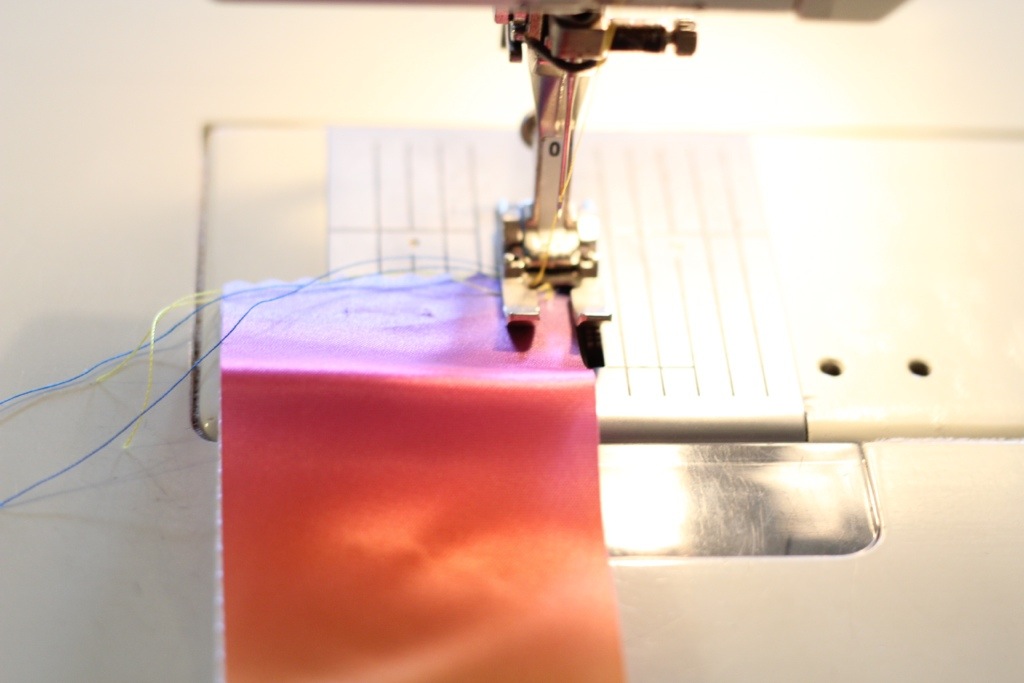
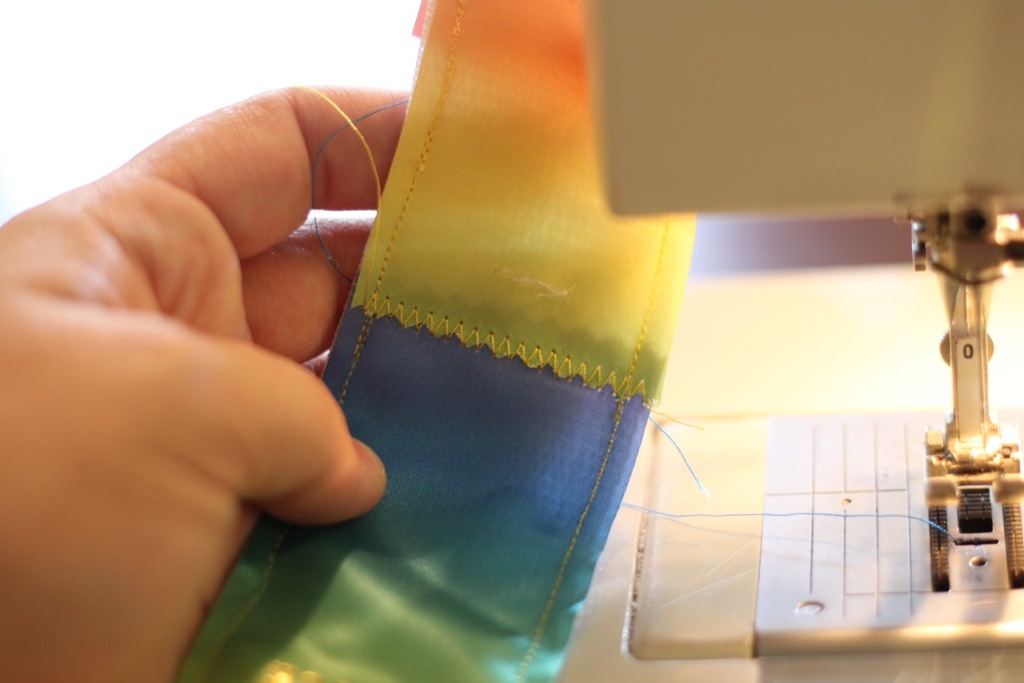
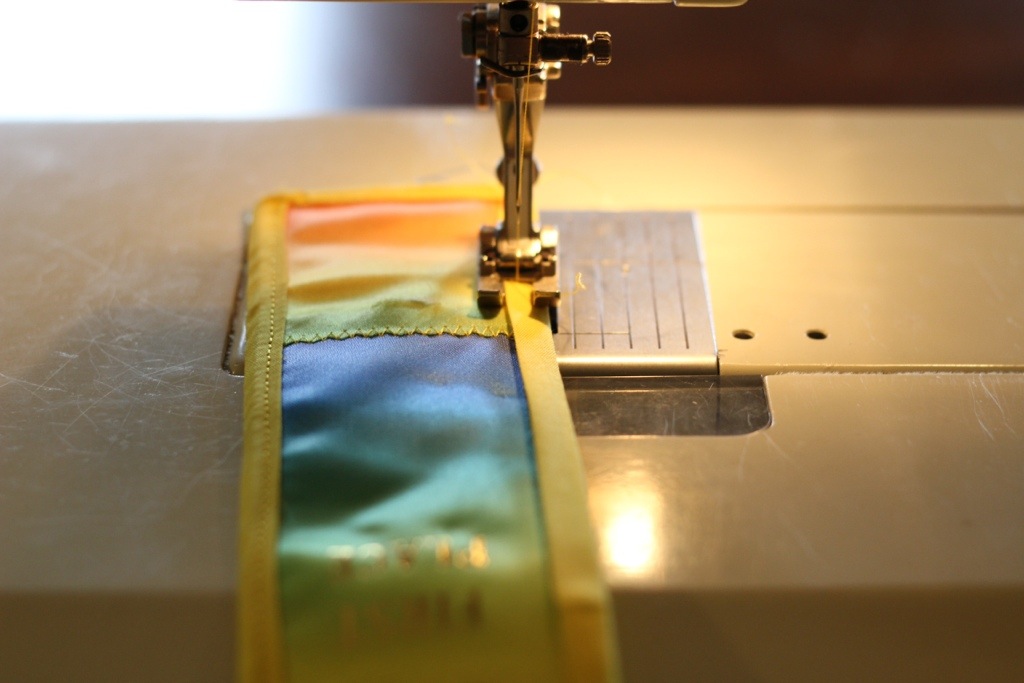
Start by sewing the ribbons onto the nylon. Because I only wanted to use a few ribbons, I did this parallel to the nylon. Be careful that your edges match and your stitches are a few mm from the edge. The thread color doesn’t need to match because well be covering this up later.
Cover all of the nylon with your ribbons by sewing down the sides. I had my ribbons overlap each other but only slightly. On the end, I curled the edge of my ribbon over and continued to sew down the sides.
Once you’ve covered the outside of the ribbon, we need to secure where each ribbon overlaps one another perpendicularly. This is where you’ll want to match your thread color to the ribbon you’re about to sew. With the right color, choose a zig zag stitch and sew over the intersection of ribbons to secure it down.
At this point I goofed but fixed my mistake – so I’ll tell you what to do in the correct order. Now that the front of the belt is seen, you need to do the reversible part. I flipped the belt over and choose one end to add about 8″ of ribbon to. This gives you enough room to tighten the belt and have he decoration show, but not have to make the whole thing double sided.
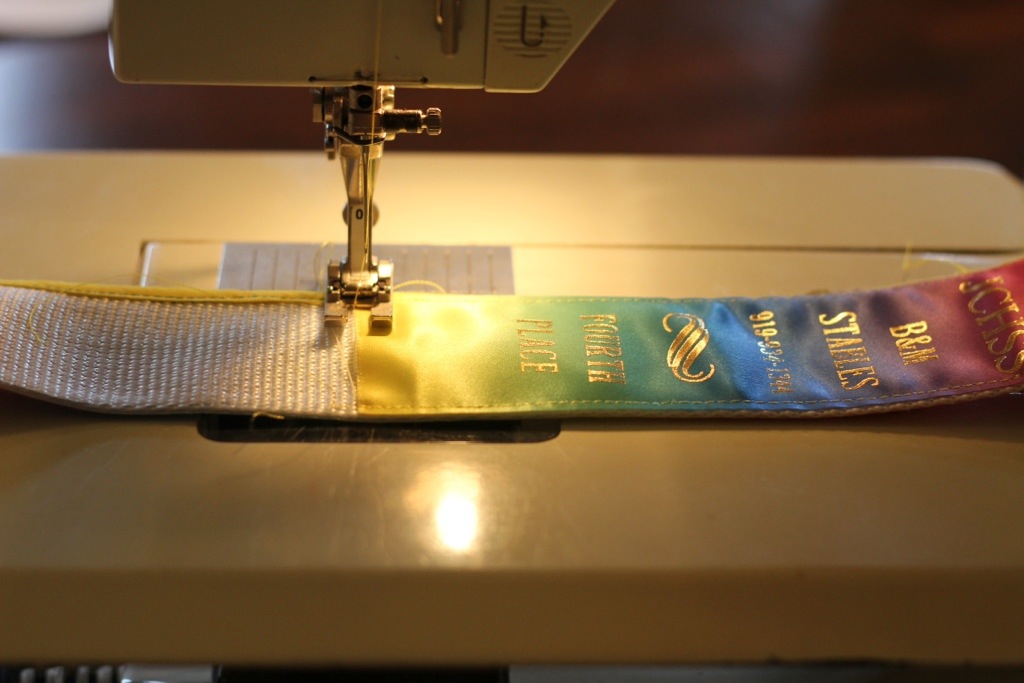
With all the ribbon sewn on your nylon, it’s time to add the trim.
Fold the blanket binding around your belt, and carefully sew it down the sides. This is your outward facing stitching, so I took my time and tried to keep everything straight and even. Sew the binding all the way around the belt.

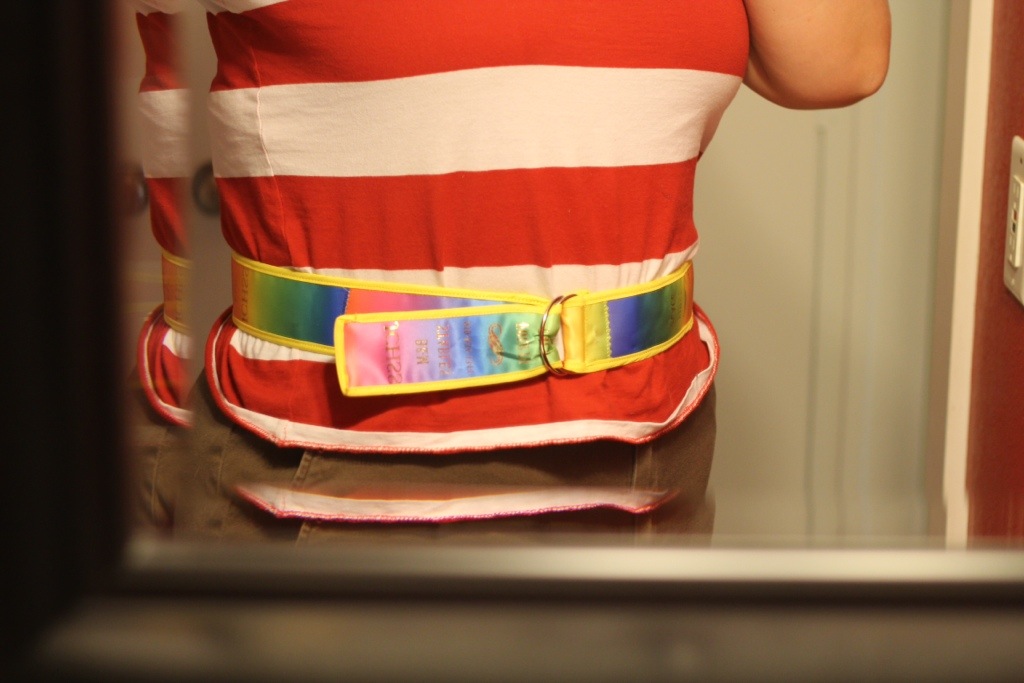
Now we only have one step left! Sew the two D ring onto the belt. Sew these onto the side that does not have the extra 8″ of ribbon sewn onto it. You may need to change your sewing machine foot to a zipper foot since this area is going to be very thick and the metal rings are a bit in the way. Sew back and forth several times so this area is strong.

Now voila! We’re done. I’m not a perfect seamstress by any means so I’m sure others could improve on this… But this will get y’all started if you want to make a cool keepsake belt out of your ribbons!


20 thoughts on “How to Make a Ribbon Belt With Horse Show Ribbons”
LOVE the belt! Excellent pics!
I also love the ribbons! 😉
That turned out SUPER nice! However, I would not recommend wearing it with the red stripey shirt. It’s um… classy. 😉
With your post the other day, the thing that caught my eye most was actually the belt. I’m glad you did a tutorial! This turned out great!
Love it! Once I have a bunch of ribbons, I’m going to try it.
Awesome job.
Wow! Very cool!
Love It! Very cool idea and I like the rainbow ribbons too.
Wow. Awesome job sewing and really cool idea! BTW — I have zero skillz with sewing machines so to me this looks completely pro.
Dang go girl!!! Now I want a sewing machine!!
What a brilliant idea!
Wow! Very creative and great sewing job. I sew a little but not sure I could really pull that one off!
SO COOL! I think yours turned out great. I bet you could make money making these for people!!
Awesome! You could make those and sell them 🙂
Cool!! I wish I could sew more than a button lol
So cute!!
Wow, you are so multi-talented!
HEY, this is just super!!! I have a box full of childhood ribbons that I would love to make something with, and this would be a super starter project (if I was rich I would send them off to get a quilt but no $$ for that). My only problem is all the blue ones are now purple… oh, well, at least they still say First Place on them! 🙂 I have seen these for sale with the ribbons chopped into smaller vertical pieces. Obviously this would take a lot longer to construct. Will have to think about it… Thanks so much!